Segmentation and refinement
Create, refine and exchange independent, overlapping masks in MPR.
On this page
1. Draw a region
Enable MPR → Threshold segmentation for CT/PET, or 4D → Threshold segmentation for CT. Drag a rectangle with the left mouse button and release. All three planes show the region; 4D shows only regions belonging to the current phase.
2. Set a threshold
Choose Absolute / %, then enter a threshold or use the slider. Voxels ≥ the threshold within the region are colored and counted. Check the CT/PET unit first.
3. Set depth
Default depth is √(width × height), extending both ways from the drawing plane. Direct depth adjustment selects Manual. Switch back to Auto to follow width and height.
Edit or troubleshoot
Return to the original plane. Drag the interior to move, or corners to resize. If no result appears, check position, threshold, unit and depth. N = 0 means no valid voxels meet the criteria.
Export SEG
Finish segmentation and wait for statistics, then choose Export → Export SEG. Regions in this tab and phase on the same source grid share a binary multi-segment SEG, retaining overlaps. Large collections are batched within a memory budget. Adjust empty regions before exporting.
Import and manage SEG
Import source DICOM on the left, open its MPR / 4D tab and phase, then import segmentation on the right. Native-grid binary SEG supports multiple and overlapping segments. Rename, recolor, show, hide, refine or delete them, with undo and workspace persistence.
Paint and Erase
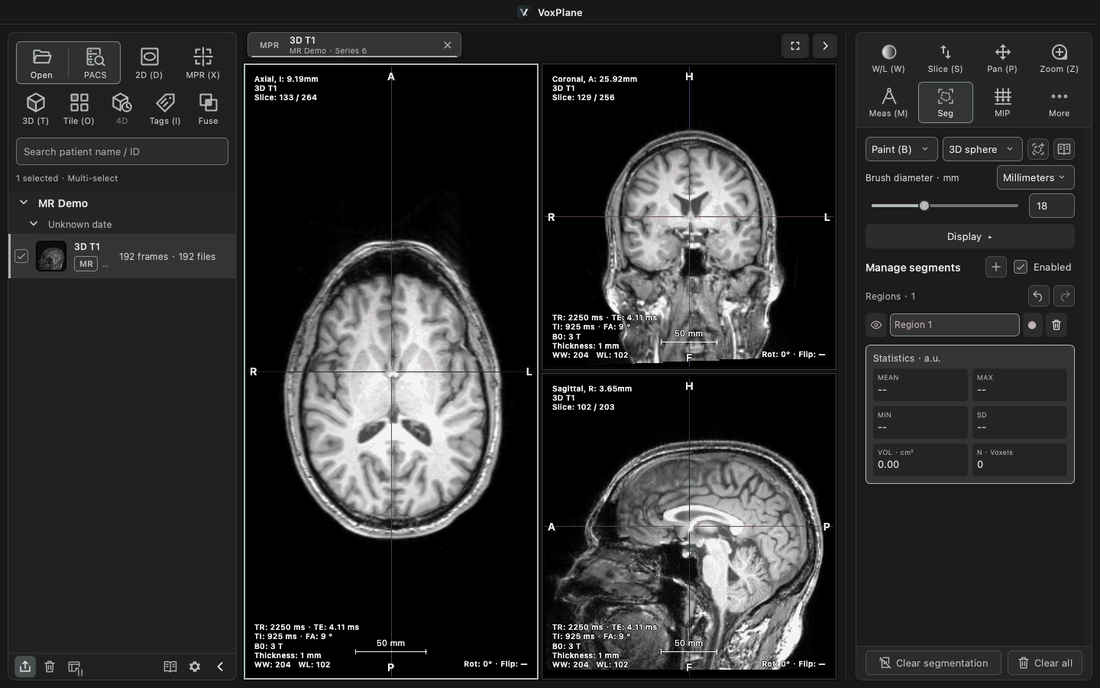
When no segment exists, choose Paint and draw; the first completed stroke creates it. With an existing segment, Paint and Erase edit the selected item; switching tools does not create another segment. Use + beside Manage segments to create and select an empty segment. New segments preferentially use an unused color. Paint and erase have distinct cursors and a footprint preview.
Millimeters: the slider covers 1–50 mm; exact input accepts 0.1–100 mm, initially 5 mm. View (%): diameter is 1%–25% of the viewport’s shorter side, initially 3%. Screen size stays constant when zooming; physical size changes.
Choose Current slice / 3D sphere, then drag. Release commits; Esc cancels. Each stroke is one undo step; other segments remain unchanged. Undo and redo icons beside segment management show platform shortcuts on hover. The help icon is beside the slice selector at the top. Available in CT, MR and PET MPR. Refining a threshold result converts it to a fixed voxel mask.
Islands
Choose Keep selected island / Remove selected island and click inside the selected segment. Islands use 3D face connectivity (six neighbours), not a 2D outline. Operations are undoable. An erased, empty segment can be painted again; fill or delete empty segments before DICOM SEG export.
Outline and fill display
Expand Display in the segmentation panel and choose Fill / Outline / Fill + outline. The default is fill + outline with 30% fill opacity. The 0–100% slider controls how strongly the fill covers the image. It is disabled in outline-only mode and retains its value. Outlines follow the inner pixel boundary of the actual mask sampled on the current plane, including holes and separate regions, without smoothing. Settings apply to all segments in this tab (shared across 4D phases), not other tabs or VOIs. They are saved with the workspace and do not change masks, statistics or SEG / NRRD exports. Use each segment’s visibility button to hide it.
NRRD / Slicer exchange
In the source DICOM MPR / 4D tab, choose Export → Export NRRD / Slicer. This writes the current phase to source.nrrd and segments to segmentation.seg.nrrd, including hidden and overlapping segments. Load both in Slicer, edit and save .seg.nrrd. Return to the same source DICOM and phase, then choose Import segmentation → Import segmentation · SEG / NRRD on the right. 3D integer-label NRRD is also supported. Files require millimetres and LPS/RAS coordinates. Mismatched grids are rejected without automatic resampling. NRRD usually lacks reliable patient/series identity; check the reference image and phase.
Local automatic segmentation: setup
In Settings → AI → Local automatic segmentation, choose Check environment. Discovery checks the dedicated TotalSegmentator-Local installation, common Conda environments and a Python on PATH for an installed TotalSegmentator package. If none is found, open Advanced and choose the Python interpreter and model folder. On Windows select the environment’s python.exe (usually under Scripts for venv, or at the environment root for Conda); on macOS select bin/python. Manual paths take precedence. Restore automatic discovery clears those overrides and checks again. Paths appear only in hover hints.
The model folder should contain Dataset297_TotalSegmentator_total_3mm_1559subj; selecting its model, trainer or fold_0 folder is also accepted and normalized to the parent. The check examines dependencies, interfaces, devices, model files and JSON configuration. It does not run inference, verify available inference memory or weight integrity, install dependencies or download models. Automatic prefers CUDA, then Apple MPS, then CPU. An unavailable saved device is explicitly labeled and must be changed; it is not silently replaced.
The tested combination is TotalSegmentator 2.18.0 on macOS / MPS. Other versions or platforms remain labeled untested even when interface checks pass; incompatible interfaces or CT fast models are rejected. After upgrading, check again and verify segmentation and spatial alignment on a sample. Windows discovery has automated coverage, but Windows hardware validation is still pending.
Local automatic segmentation: run
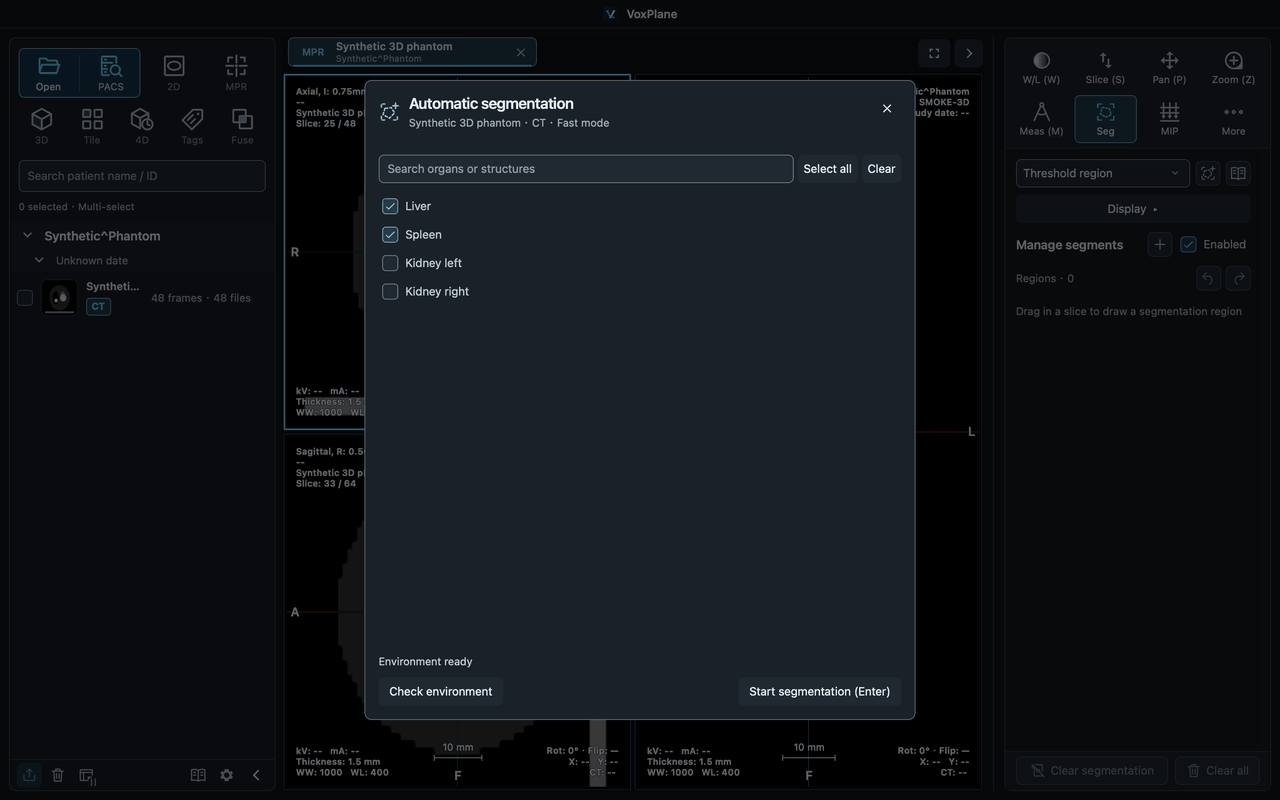
Click Automatic segmentation at the top of the CT MPR / 4D → Segmentation panel. Confirm the series and current phase, search and select organs, then start. Liver, spleen and both kidneys are selected by default; your last selection is remembered. Input is the full original HU volume for the current phase, unaffected by windowing, display cropping or rotation. Only calibrated, regular orthogonal CT grids are supported. MR, ordinary 2D, non-HU derived images, sheared and irregular volumes are excluded.
The organ list is read from the selected TotalSegmentator installation’s total model label map during the environment check. It lists supported structures, not organs already detected in your image. VoxPlane provides Chinese and English labels, with English names for unknown structures. Check again after upgrading to refresh the list; typing a name cannot add a structure the model does not support.
Local automatic segmentation: results and cancellation
You can continue browsing during inference. If you change phase or are editing, results wait until you return to the target phase and finish editing. Closing the target or replacing its data discards the results. Cancellation and failures never import partial results; open Details for errors and logs. GPU failures do not trigger an automatic CPU retry.
After validation, results are appended as one undoable operation; repeated runs preserve existing segments. Undetected organs are skipped and reported. Rename, recolor, hide, adjust outlines/opacity, refine with the brush, save a workspace or export SEG / NRRD as usual. Restoring a workspace needs no TotalSegmentator installation and never reruns inference. Review and refine automatic results before use.
After a successful import, the organ selection and details dialogs close automatically to reveal the segmentation. The panel keeps the completion count and any undetected-organ notice. On failure, organ selection stays open with the specific reason and the selected organs preserved; review the detailed log and retry.